How to use Xhorse SW-007 Smart Watch ?

This is a guide on how to use Xhorse Keylessgo Watch configuration & programming to your vehicle step-by-step.

How To Use Xhorse Keylessgo Watch Smart Remote 1

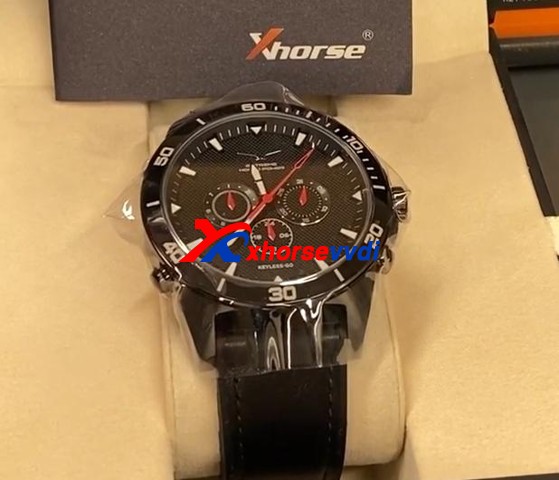
 SW-007 Keyless go Watch is another Xhorse Universal Smart remote. It can be programmed by your Key Tool Plus, Key Tool Max or even Mini Key Tool. The process is similar to another Xhorse universal key:1)Pick the FCC ID, remote, or your make and model2)Write the configuration into the watch3)Program it to the vehicle by any key programmers you want Here is a complete demonstration for reference:

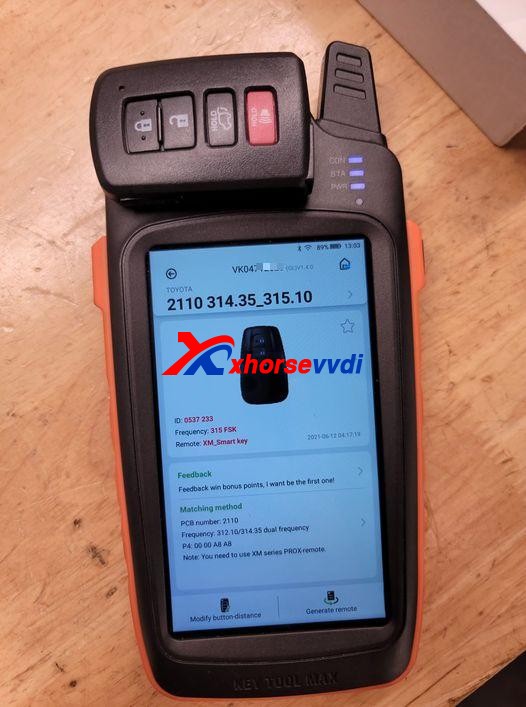
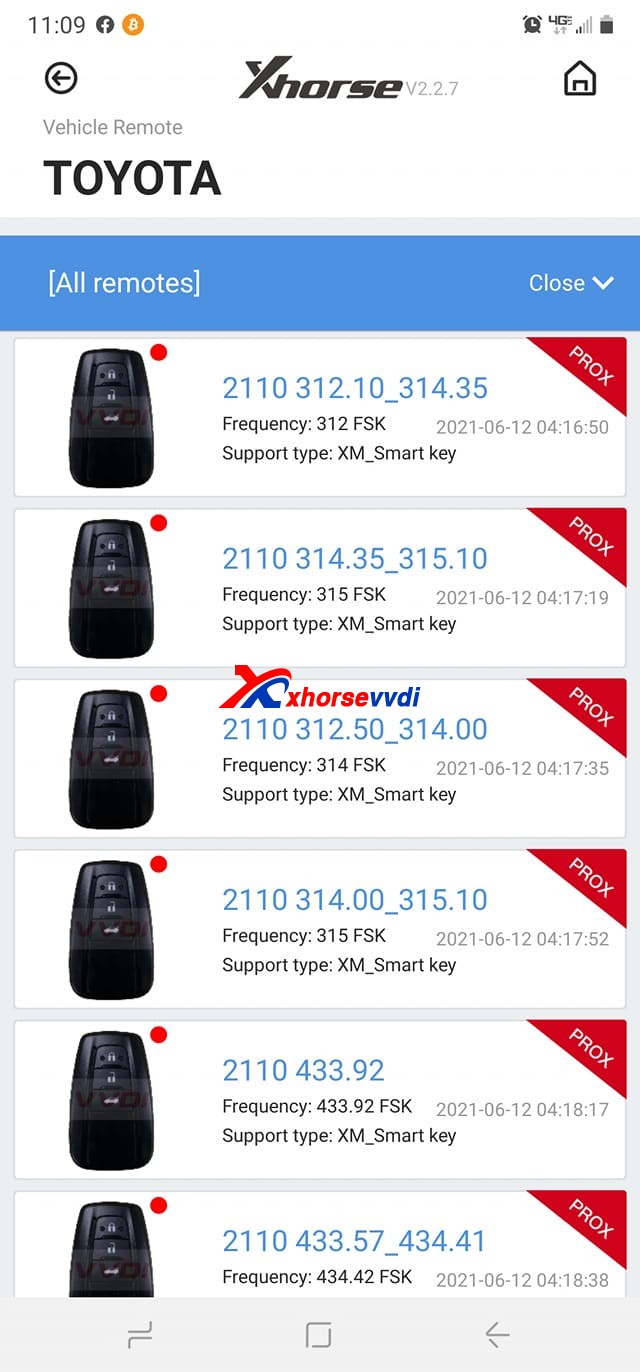
Part 1. Generate the remoteGo to

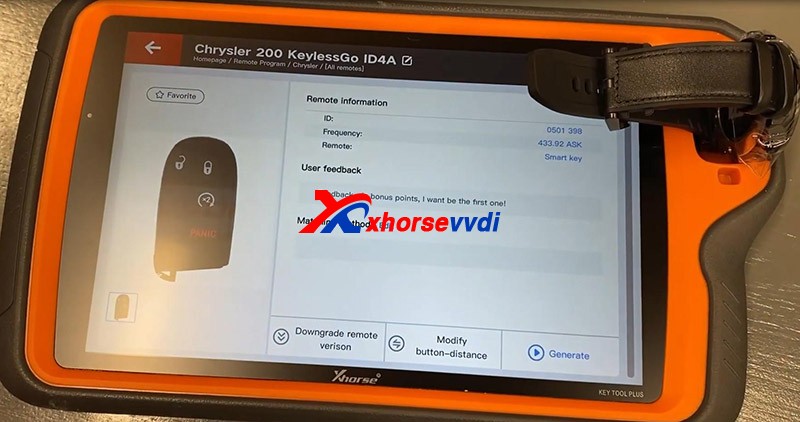
  • Remote Program>>North America>>Chrysler>>[All Remotes]>>Chrysler 200 KeylessGo ID4A

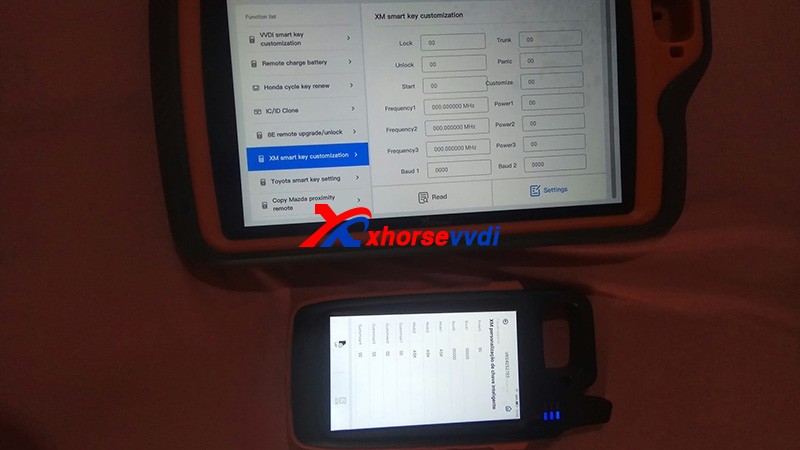
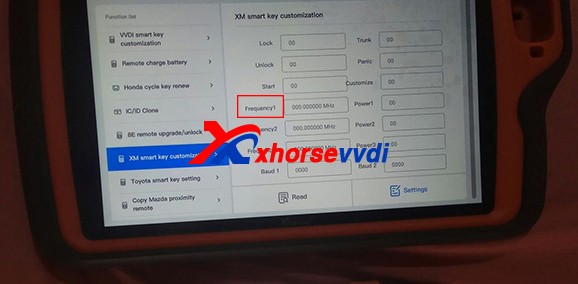
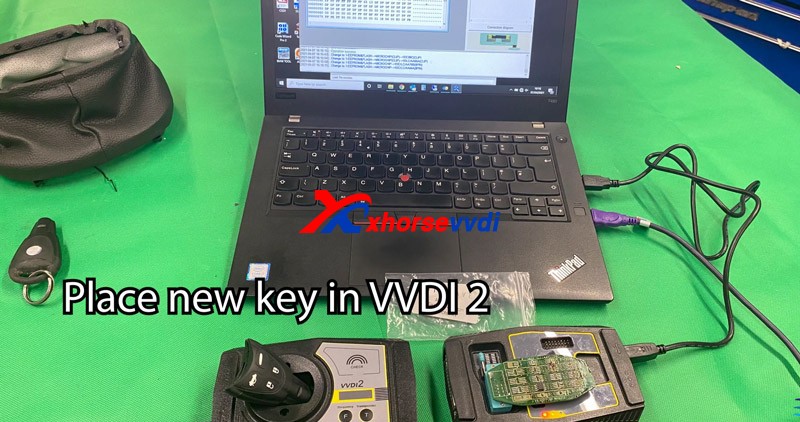
Put your smartwatch into the key coil and press “Generate”.

How To Use Xhorse Keylessgo Watch Smart Remote 2

Here if you experience the error “Write Failed”, put your watch slightly deeper so that it could be detected.

How To Use Xhorse Keylessgo Watch Smart Remote 3

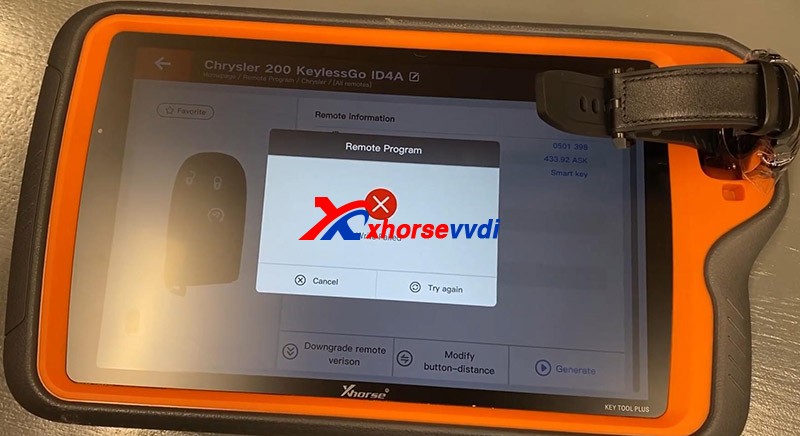
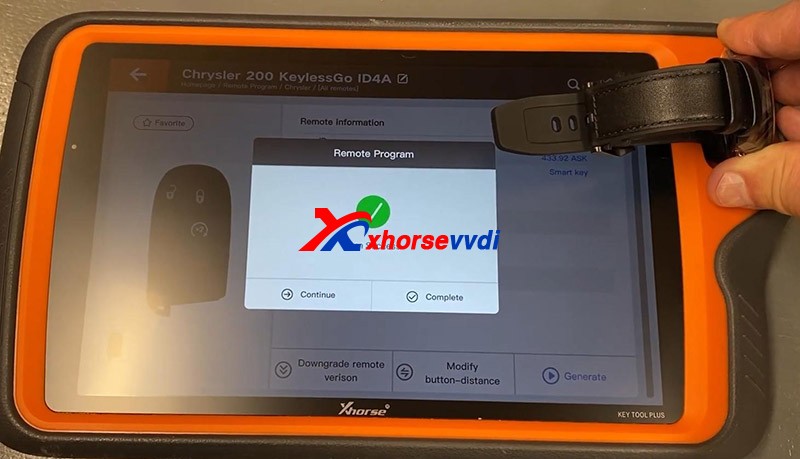
Try again and you should put a slight bit of downward pressure on the watch and it would be done.

How To Use Xhorse Keylessgo Watch Smart Remote 4

Part 2. Program the immobilizerPlug Key Tool Plus to the vehicle via OBDII, and don’t forget the FCA 12+8 Converter since there is a security gateway in this model.Go to

  • Immo Programming>>North America>>Chrysler>>Select by model>>ASIA>>200>>2019-2021>>Smart key system>>Start Programming
How To Use Xhorse Keylessgo Watch Smart Remote 5
How To Use Xhorse Keylessgo Watch Smart Remote 6
How To Use Xhorse Keylessgo Watch Smart Remote 7

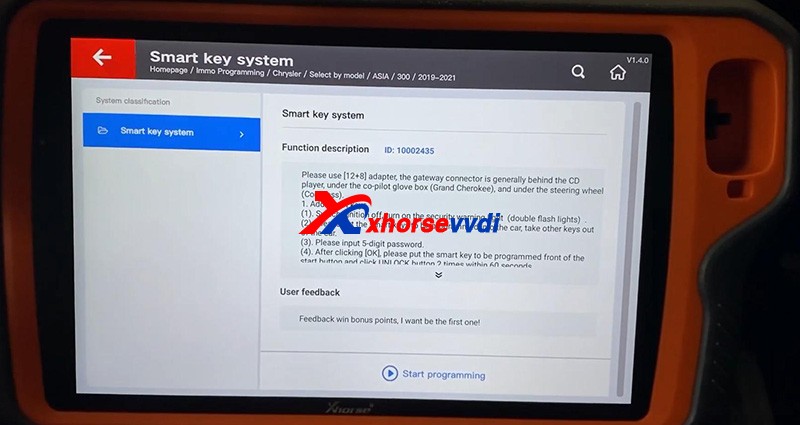
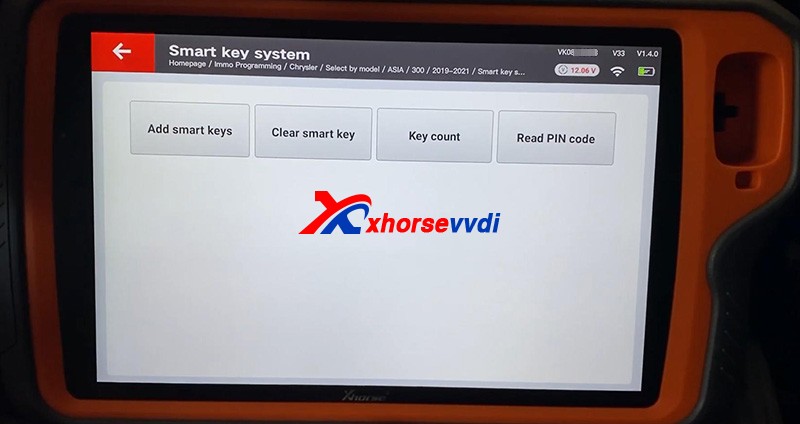
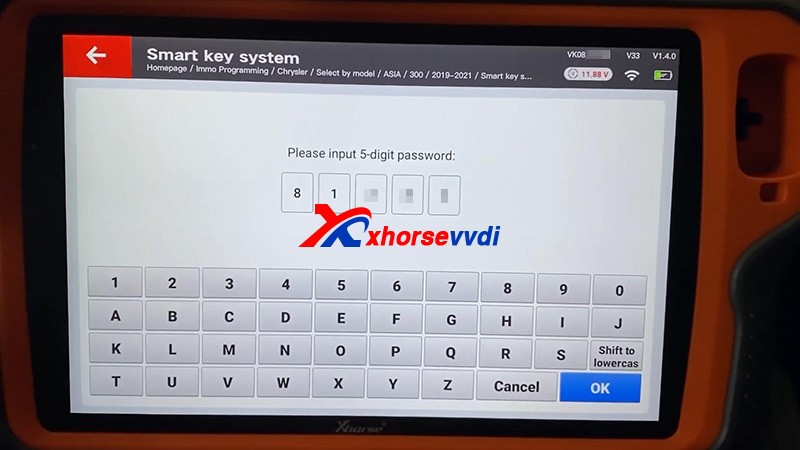
  Check “Key Count” and “Read PIN code”.Then press “Add smart keys”

How To Use Xhorse Keylessgo Watch Smart Remote 8
How To Use Xhorse Keylessgo Watch Smart Remote 9
How To Use Xhorse Keylessgo Watch Smart Remote 10
How To Use Xhorse Keylessgo Watch Smart Remote 11

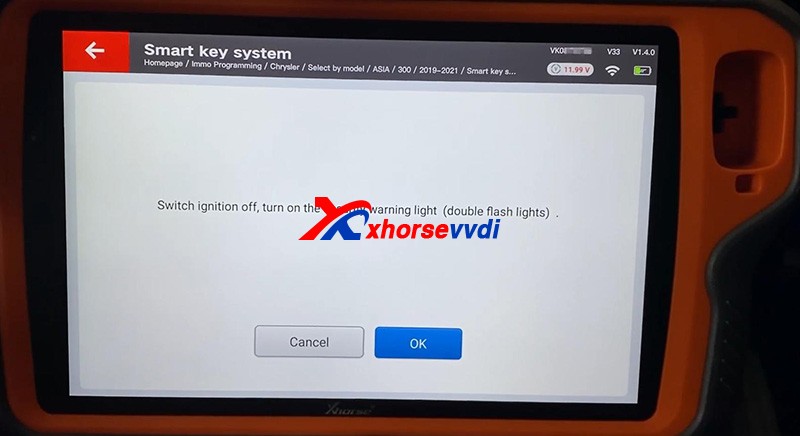
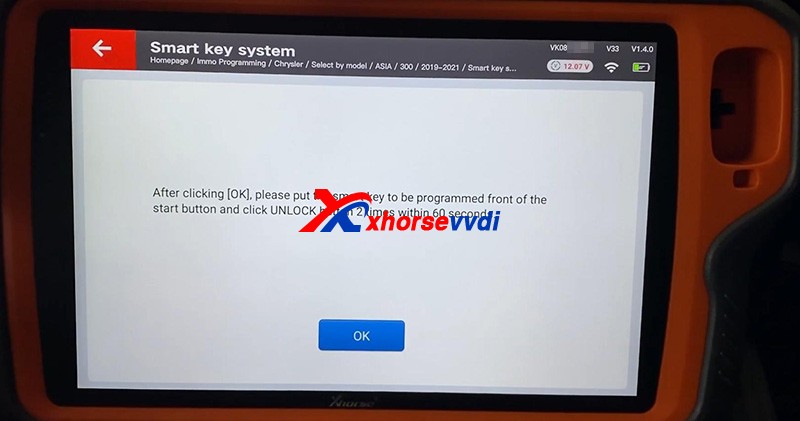
   If it prompts “Fail”, try if the watch could work first.Start the vehicle, no problem.

How To Use Xhorse Keylessgo Watch Smart Remote 12

Done!That’s how to use Xhorse SW-007 Smart Watch. Thanks to xhorsevvdi for making this tutorial :http://blog.xhorsevvdi.com/how-to-use-xhorse-keylessgo-watch-smart-remote/
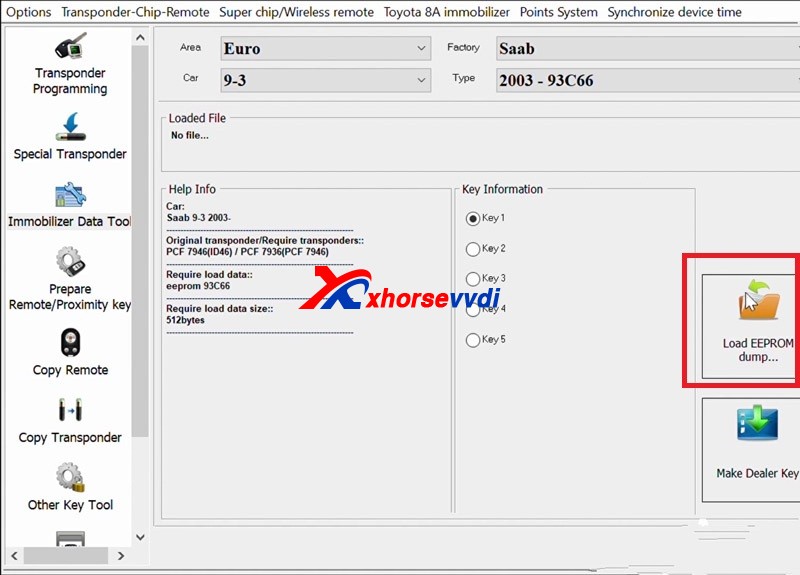
Xhorse Dolphin XP-005L vs Dolphin XP-005 vs Condor XC-MINI Plus

2021 new Xhorse Dolphin XP-005L Key Cutting Machine is taking pre-orders now at xhorsevvdi.com.

Lets see the difference among them:

ItemDolphin XP-005Dolphin XP-005LCondor XC-MINI Plus
Image
Price(USD)1950$2250$2700$
Weight(Net)15kg13kg18kg
Weight(Gross)18kg18.5kg22.9kg
Size315x218x270mm390*220*270mm265*362*301mm
Screen×Angle adjustable 5-inch LCD touch screenAngle adjustable 7-inch LCD touch screen
Smart status indicator×Yes (in blue, yellow, red color)×
Protection coverYes,not enoughYes, goodYes, good
UpdateDatabase update in APP, firmware update via Xhorse update kit


Online Update
Online Update, support offline file update.
ClampM1M2,
M3(optional)
M4(optional)
M1, M2, M5(=M1+M2)
M3(optional)
M4(optional)
M1, M2,
M3(optional)
M4(optional)
ManipulationPhone APP/Key Tool MaxPhone APP/StandaloneStandalone
Offline operation××
All keys lost

What is Clamp M5?

The new clamp M5 is equal to clamp M1 plus M2, supporting Dolphin II XP-005L and Condor XC-MINI II(coming soon).

Clamp M5 has side A and B, so users can turn it over as cutting needs instead of replacing different clamps. Detailed method is:

Loosen the key lock knob, turn over the clamp and tighten the key lock knob.

What new features on Dolphin XP-005L?

Dolphin XP-005L ≈Dolphin XP-005 software(function) + Condor XC-MINI Plus hardware.

Compared to Dolphin XP-005:

300$, we’ll get

An HD screen(you don’t have to operate on your phone or buy a Key Tool Max),

A larger protection cover(Some customers gave a feedback that they wanted to buy a separate shell for Dolphin XP-005),

Online update(Firmware update via Upgrade Kit is a big trouble to some customers)

Lower weight(Easier to carry out)

M5 clamp(Make operation easier).

Compared to Condor XC-MINI Plus:

450$, we’ll lose

A larger screen, offline operation. However, XC-Mini Plus doesn’t have a built-in battery so hard to take it out.

Personal review

Basically for me, 300 bucks to get a screen, don’t worth it. Just pay more 50 bucks and I can get Key tool max plus XP-005. And lower weight and the combination M5(M1, M2) also don’t interest me, but I’d like to pay for online update, because when the device needs a firmware update, you have to request a link to the update software application through the support section of their phone app. I couldn’t get it to communicate with my Dolphin xp005 over USB, and  eventually I do the update using a friends computer.

As for Condor Mini Plus, you can see the biggest difference is that it allows you to cut keys without network support. It’s very useful, but the price is too high. See if you really need that function.

Who Views This Also Viewed:

  1. 2021 New Xhorse Dolphin II XP-005L Key Cutting Machine Coming Soon! (27)
  2. What is the difference of Xhorse Dolphin XP-005 and Dolphin XP005L? (26.3)
  3. V2.2.1 Xhorse APP Update, Support Dolphin II Key Cutting Machine (17.9)
  4. Xhorse Dolphin XP-005/Condor XC-Mini Plus Cutter & Probe Breaks Test Method (17.6)
  5. Xhorse Dolphin XP005 VA2/VA6/VA2EH Bug will fix in new Xhorse APP (16.5)

How to solve VVDI Max Program XM Smart Key Prox Feature doesn’t Work

Q:

Working on a Toyota Tacoma 2016 smart key board 2110 using VVDI Key Tool Max, Only one option makes the remote work but none has the proximity/smart feature working, Toyota Rav4 2018 the same issue.

Xhorse VVDI Key Tool Max Program XM Smart Key  01
Xhorse VVDI Key Tool Max Program XM Smart Key  02

Here Xhorsevvdi engineers answer:

Sometimes a smart key generated successfully may not fully function the vehicle: remote doesn’t work, doesn’t have smart feature or even one button fails etc., which needs us to modify smart key’s values manually.

Possible reason:

Xhorse XM smart keys are universal keys, not particular for one model like Toyota Tacoma 2016, so we need to customize XM smart key to find correct values for each car.

Solution:

XM smart key customization by VVDI Key Tool Plus or Key Tool Max.

Path: Special Function>>XM smart key customization

Xhorse VVDI Key Tool Max Program XM Smart Key  03

1)Modify Frequency

Sometimes the frequency options given to us is slightly different from that of the smart key to be programmed.

So read out the frequency “A” that your vehicle wants by Xhorse devices, then read original XM smart key frequency “B” and set “B” to “A”.

Xhorse VVDI Key Tool Max Program XM Smart Key  04

2)Modify Baud

Read key’s Baud, increase it by 400, and test if it works perfectly.

If not, add Baud again by 400 until it works well. (The last two numbers may vary automatically, which is normal.)

Xhorse VVDI Key Tool Max Program XM Smart Key  05

Customer feedback:

I had exactly the same problem with a Corolla 2018, and I just made the changes on the ID and frequency as well and everything works…

Thank Tyler and Raphael for sharing!

Hope this could help!

More info, please check

http://blog.xhorsevvdi.com/fixedkey-tool-max-program-xm-smart-key-prox-feature-doesnt-work/

BMW M3 2011 add key with Xhorse VVDI Mini Prog & Key Tool Max

Xhorsevvdi.com is going to share with you how to use Xhorse Key Tool Max and VVDI Mini Prog & BMW CAS3+ adapter to add a new key for BMW M3 2011 with a CAS3+ module.

Step 1

First remove the CAS3+ module.

Now on bench, clean points on the module.

Remove MINI Prog head.

Then Use XDNP11 BMW CAS3+ adapter to connect VVDI Mini Prog and the circuit board.

BMW M3 2011 add key with Xhorse VVDI Mini Prog & Key Tool Max 01

Step 2

Turn on MINI Prog.

Open up Xhorse app on your phone.

Switch to the MINI Prog page.

Click on “Select” to connect your phone to mini prog.

BMW M3 2011 add key with Xhorse VVDI Mini Prog & Key Tool Max 02

Step 3

Select

  • Immo>>BMW>>BMW>>CAS3+(0L15Y)(ADAPTER)

Check if it’s connected well by diagrams.

Then select

  • Read>>EEPROM>>Start operation

Data reading success and save the file.

BMW M3 2011 add key with Xhorse VVDI Mini Prog & Key Tool Max 03

Step 4

Now back to Key Tool Max page.

Select

  • Special Function(Network connection needed)>>Immo Data Tool>>Europe>>BMW>>CAS3+ (0L15Y, 0M23S)>>CAS3+

Load the file we just saved.

BMW M3 2011 add key with Xhorse VVDI Mini Prog & Key Tool Max 04

Follow the prompt to add a new key.

Done!

That’s the procedure of BMW CAS3+ key programming using VVDI Key Tool Max and Mini Prog with Xhorse BMW solder-free adapter.

http://blog.xhorsevvdi.com/xhorse-vvdi-mini-prog-key-tool-max-add-key-for-bmw-m3/

How to Renew the BMW F Series After Market Key with Xhorse VVDI MAX?

Question on Xhorse VVDI Key tool maxor vvdi mini key tool: how to renew the bmw f series after market key, soldering points please.

Renew the BMW F Series After Market Key with key tool max 01
Renew the BMW F Series After Market Key with key tool max 02

How-to guide:

Xhorse VVDI Key tool max or vvdi mini key tool can’t renew the After Market Key, because it may be unstable, if it is an Xhorse smart remote, it can burn the data without renewing.

Also, someone reports:

Desolder the pcf and insert in the adapter. Already done.

As for Huf-F Series 868MHz, it is not available yet, please use the renew cable to desolder instead.

Renew the BMW F Series After Market Key with key tool max 03

 http://blog.xhorsevvdi.com/renew-the-bmw-f-series-after-market-key-with-key-tool-max/

Program Audi TT 2003 Fobs key with xhorse iscancar MM-007 -NO ISUUE

Lost 2 sets of key fobs of my AUDI TT 2003 and I want to have the tools to program the keys and the remote. Which key programmer?

Experience for sharing:

Xhorse iscancar supervag 3.0 (red tool) will both extract the SKC code and add the keys.

If you want a more up to date tool then Xhorse Iscancar MM-007 (Grey tool) is the one to get.

Xhorse Iscancar MM-007 01

www.xhorsevvdi.com

Solution to Xhorse VVDI Key Tool internal error

Issue:I have problem generating proximity remote with Xhorse VVDI Key Tool. I put remote with battery inside antenna and when I push generate it says internal error.

fix  Xhorse VVDI Key Tool internal error 01
fix  Xhorse VVDI Key Tool internal error 02
fix  Xhorse VVDI Key Tool internal error 03

Problem was SOLVED.

I had upgraded firmware from 3.3.2 to 3 3.4 and proximity remotes works perfect.

Alright, although Xhorse VVDI Key Tool discontinue producing and replaced by VVDI MINI Key Tool, if you have any questions, you will be served.

any further questions,please feel free to contact us:

 Skype: xhorsevvdi.com
Whatsapp: +86-13983756354

https://www.xhorsevvdi.com/

How to solvd VVDI Max ID48 (96bit) online calculation “Function not activated” Error

I just bought Xhorse VVDI Key Tool Max, the problem is I didn’t know how to clone ID48 (96bit) keys, every time it shows” Function not activated”, does it have to have the bonus points to make it work? How to get the bonus points?

VVDI Key Tool Max ID48 (96bit) online calculation "Function not activated"  01
VVDI Key Tool Max ID48 (96bit) online calculation "Function not activated"  02

How to Activate Xhorse ID48 (96 Bits) Authorization:

Cheapest option:

The chips 48 are not free. You’ll generate 10 different remote controls (You need to generate keys not clone chips). But no matter what do you generate. This must be programmed 10 of them to collect bonus points and unlock the activation.

You need 10 different keys new from xhorse (Wire,Wireless,Super, Smart Remotes). Generate 10 and then you get this function activated. After that you can use the keys to get them programmed in cars.

Then the function automatically activate.

This .pdf file tells how to activate 96bit 48 clone by collecting points:

What type of VVDI remote should be generated and how many points to collect:

Wire remote = 25 points

Wireless remote =40 points

Super remote = 40 points

Smart key remote = 60 points

Another option:

Or you buy ID48 96bit Transponder Copy Authorization Service ($250).

Source of ID48 96bit Transponder Copy Authorization Service ($250):

https://www.xhorsevvdi.com/wholesale/vvdi2-copy-48-transponder-96-bit-authorization.html (It’s the same authorization that is shared with all your combined devices)

Tokens for 48 Cloning = $8

https://www.xhorsevvdi.com/wholesale/1-Token-for-VVDI2-VVDI-Key-Tool-96-bit-ID48-Copy.html

Generate the same for different car brands, 48 chip per token. Everything else is free!

Hope it helps!

Source: http://blog.xhorsevvdi.com/key-tool-max-id48-96bit-online-calculation-function-not-activated-solution/

How to generate Fiesta (Old Type) KeylessGo ID63 remote?

Trying to generate Fiesta (Old Type) KeylessGo ID63 remote using Xhorse universal smart key and smart key, But once generated it, still reads as id46 no change .

Fiesta (Old Type) KeylessGo ID63 remote

Advice:

You need a separate transponder in the key, the remote function is the keyless part transponder is emergency blade for start.

Just program remote and leave them with a HU101 key blank cut with transponder inside for emergency start.

Finally, it worked

Just added chip first them added remote works fine, just no emergency start as no place to put chip in remote.

They have old key with emergency blade and chip anyway as was remote that was playing up

So he’s was happy.

Hope it helps!

www.xhorsevvdi.com

Xhorse VVDI2 & VVDI PROG program 2007 Saab 9-3 add key

Today, we took 2007 Saab 9-3 add a spare key as an example , show you how to use Xhorse VVDI2 and VVDI PROG work together ,Some users struggle to obtain the PIN for Saab’s and cannot program via OBD so we show you the method that will overcome this problem.

  • VVDI Prog can read the EEPROM dump file
  • VVDI2 transponder programmer software program chip.

Need: Removed the CIM unit from this Saab 9-3
2007-Saab-9-3-Spare-via-xhorse-vvdi2-vvdi-prog-01
To identify the chip that needed reading
2007-Saab-9-3-Spare-via-xhorse-vvdi2-vvdi-prog-02
if we couldn’t see what number chip it was,spaying the chip with some brake cleaner did the trick, and don’t worry, this is safe and won’t cause any damage
once it dried we desoldered the chip and soldered it to the eeprom adaptor included with VVDIProg
2007-Saab-9-3-Spare-via-xhorse-vvdi2-vvdi-prog-03
Connect vvdi2 and VVDI prog (with EEPRO Adaptor mounted) to PC by USB
2007-Saab-9-3-Spare-via-xhorse-vvdi2-vvdi-prog-04
Change type to “1-EEPROM & Flash” >>Change brand “MICROCHIP”>>
Change Chip to 293/lc/AA66A (8PIN)
Then click read 05
2007-Saab-9-3-Spare-via-xhorse-vvdi2-vvdi-prog-05
Once the chip has been read save the state your PC
2007-Saab-9-3-Spare-via-xhorse-vvdi2-vvdi-prog-06
Select vehicle by changing area factory car and type
load the file that you saved Prior to this step
select key destination
2007-Saab-9-3-Spare-via-xhorse-vvdi2-vvdi-prog-072007-Saab-9-3-Spare-via-xhorse-vvdi2-vvdi-prog-082007-Saab-9-3-Spare-via-xhorse-vvdi2-vvdi-prog-09
Place the new key in VVDI2
2007-Saab-9-3-Spare-via-xhorse-vvdi2-vvdi-prog-10Make dealer key
2007-Saab-9-3-Spare-via-xhorse-vvdi2-vvdi-prog-11
Pick PCF 7936(PCF 7946) as your transponder type
2007-Saab-9-3-Spare-via-xhorse-vvdi2-vvdi-prog-12 
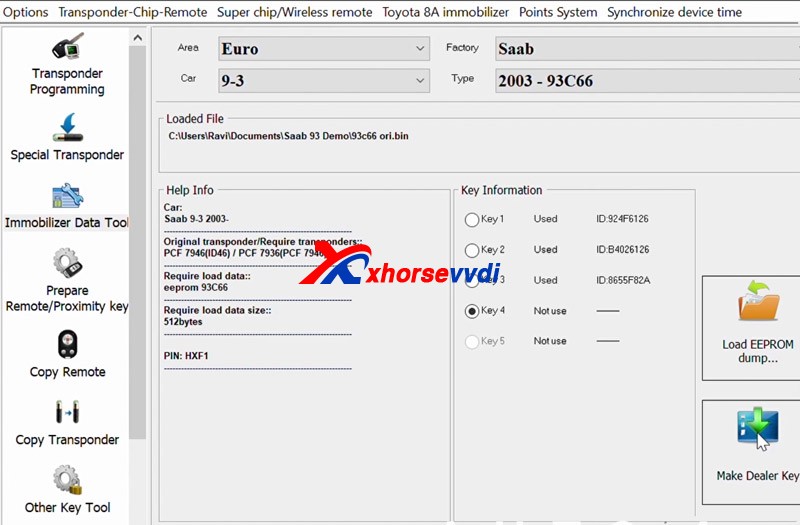
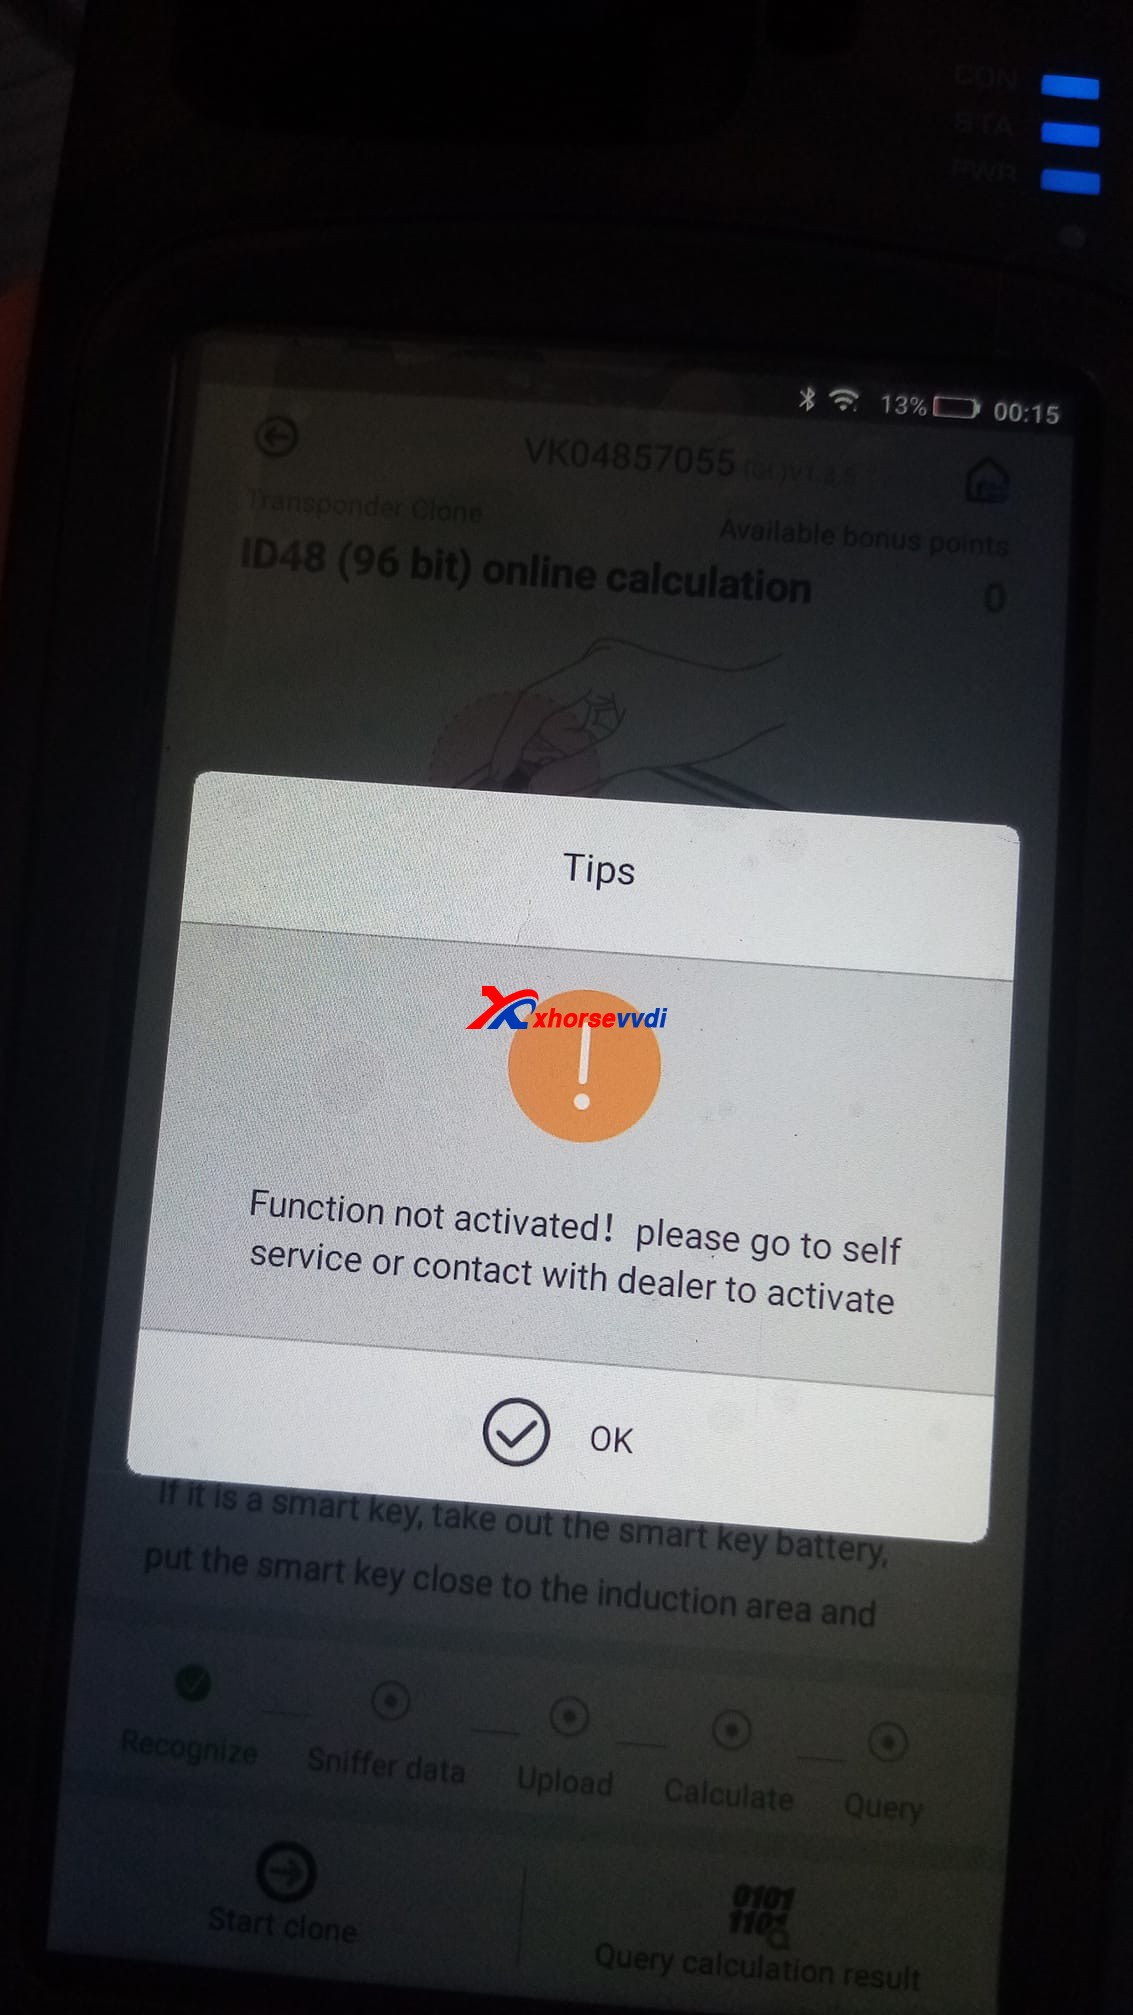
when this message appears,click ok
2007-Saab-9-3-Spare-via-xhorse-vvdi2-vvdi-prog-13
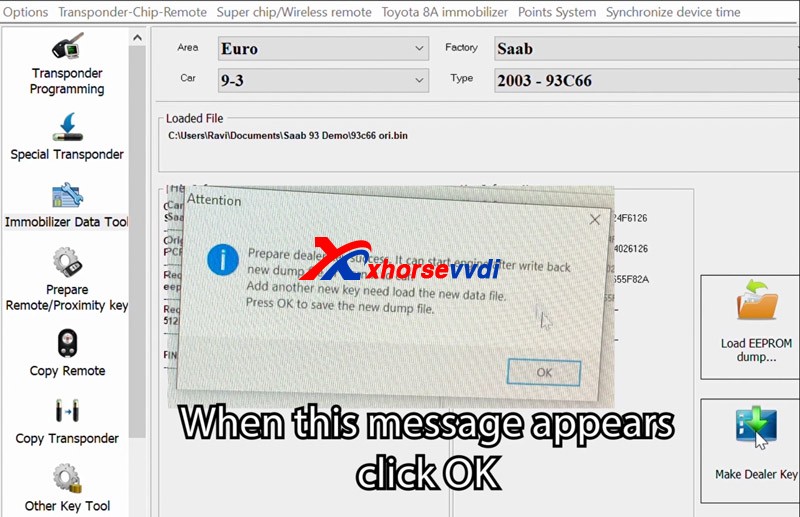
Prepare dealer key success, it can start engine after write back new dump file or learn it to car
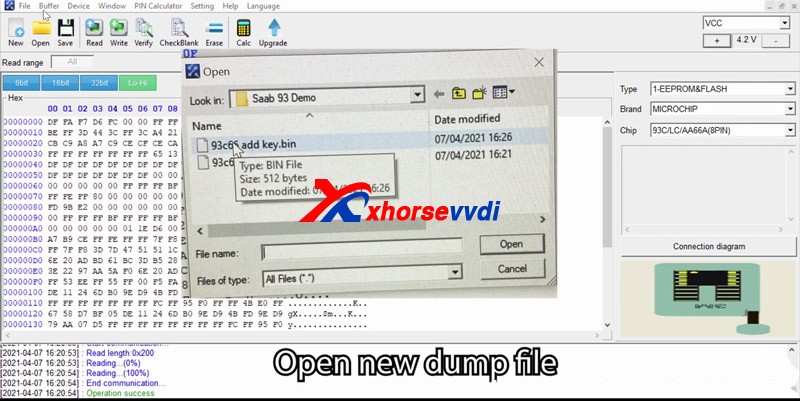
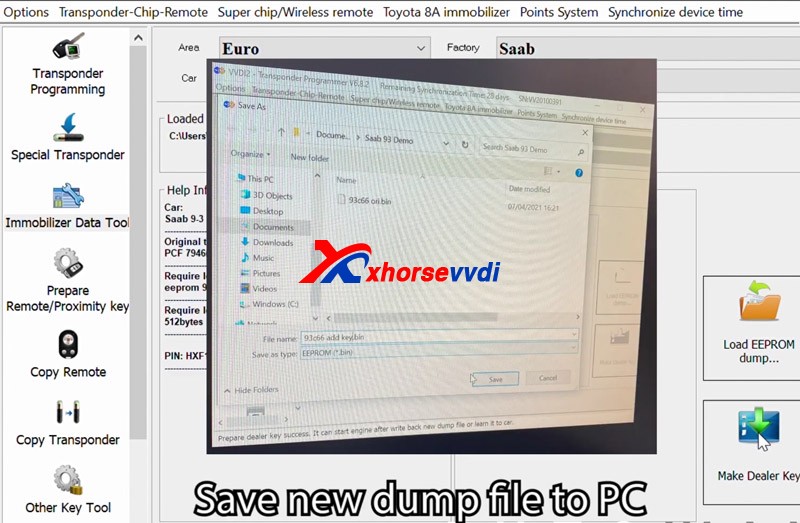
Add another new key need load the new data file,
Press OK to save the new dunmp fileSave new dump file to PC
2007-Saab-9-3-Spare-via-xhorse-vvdi2-vvdi-prog-14Open new dump file
2007-Saab-9-3-Spare-via-xhorse-vvdi2-vvdi-prog-15
Write new data to the chip2007-Saab-9-3-Spare-via-xhorse-vvdi2-vvdi-prog-16
after Operation success, then verify
check success2007-Saab-9-3-Spare-via-xhorse-vvdi2-vvdi-prog-17
Resolder EEPROM to CIM, reassemble CIM unit and install back into the car, once complete reconnect the battery
Check the spare key, it worksXhorse vvdi2 and VVDI prog program 2007 Saab 9-3 add keys successfully! https://www.xhorsevvdi.com/

Design a site like this with WordPress.com
Get started