How to read locked BCM2 with Xhorse VVDI2 & VVDI PROG

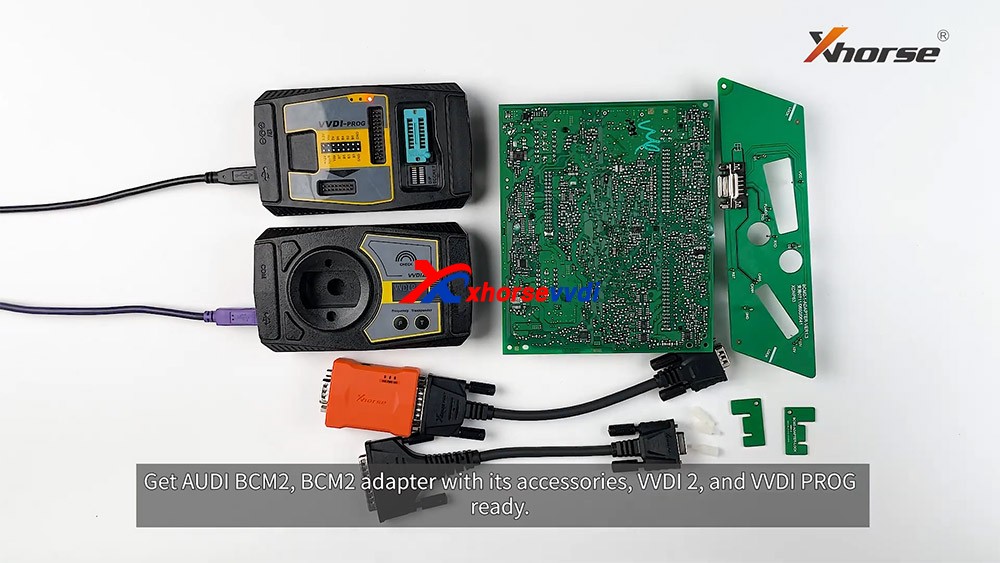
With VVDI PROG and VVDI BCM2 adapter, VVDI2 support:

  1. 2013-2019 A4L /A5/Q5 add key and all key lost
  2. 2013-2019 A6L /A7/A8 get BCM2 immo data while all key lost (Synchronize data can get from 3rd service provider)(Add key can get BCM2 immo data directly via OBDII)

What we want to do today:
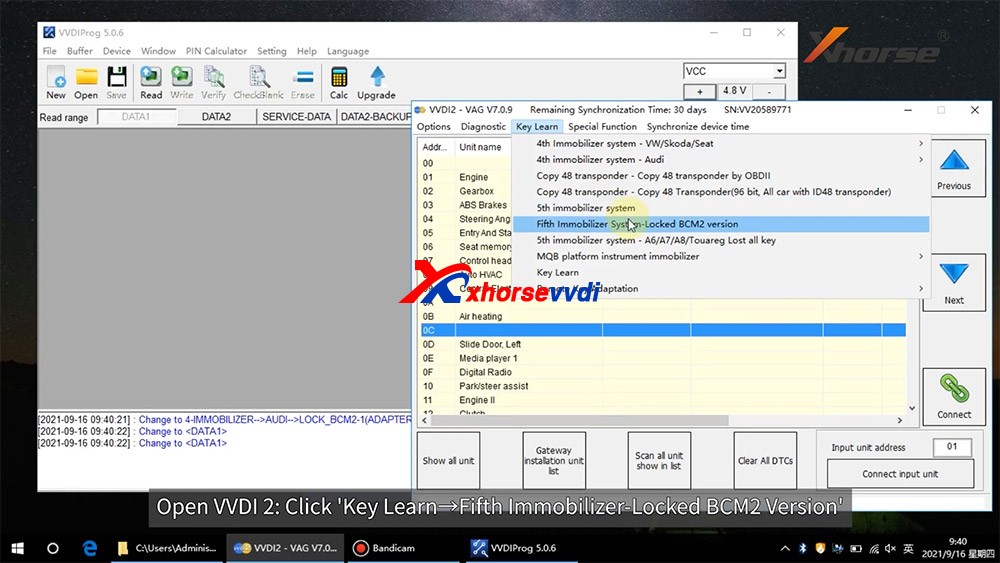
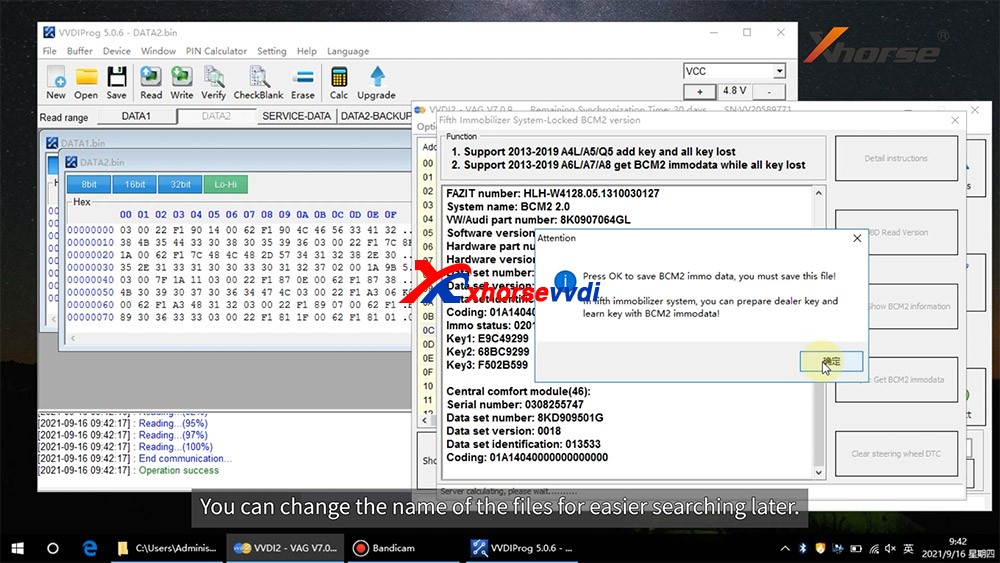
Read and write Audi 5th Immobilizer System- Locked BCM2

Good to know:

  • Warning 1 : This function is high risk, all the consequences caused are undertaken by yourself
  • Warning 2: In VVDI-PROG function, Don’t touch power supply, cable, BCM2 module!!!

How to connect AUDI BCM2 Adapter with VVDI 2 & VVDI PROG 01

VVDI-PROG data instructions:

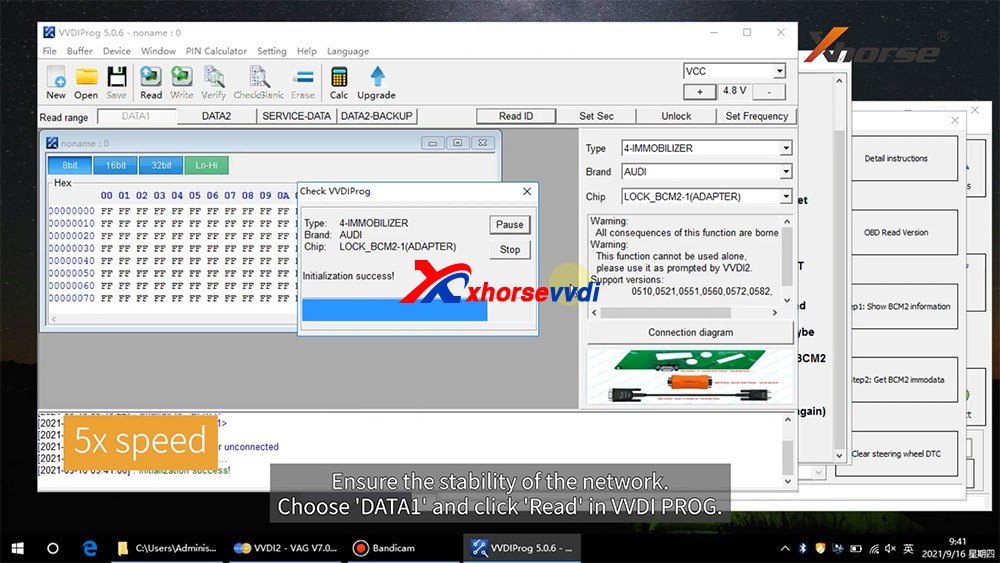
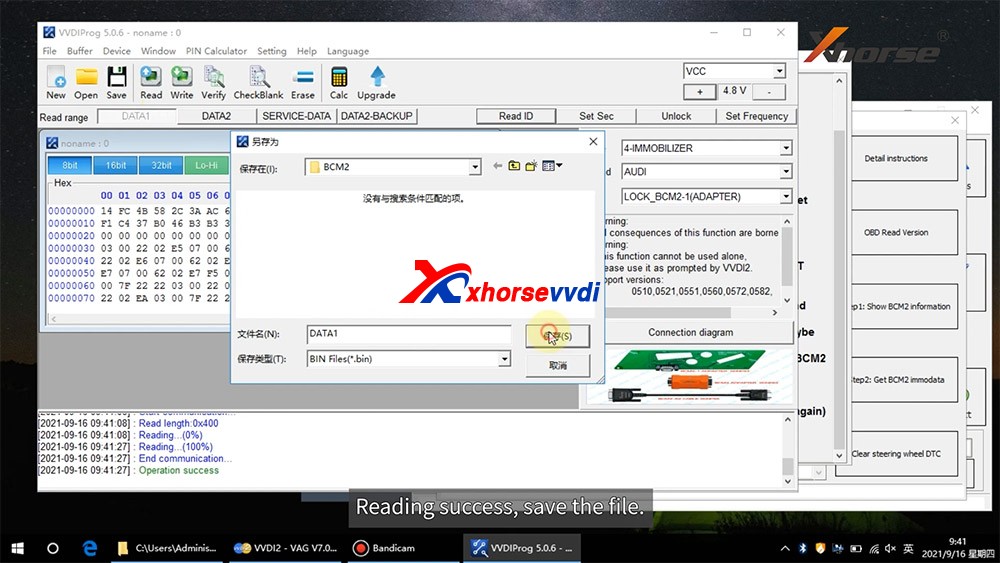
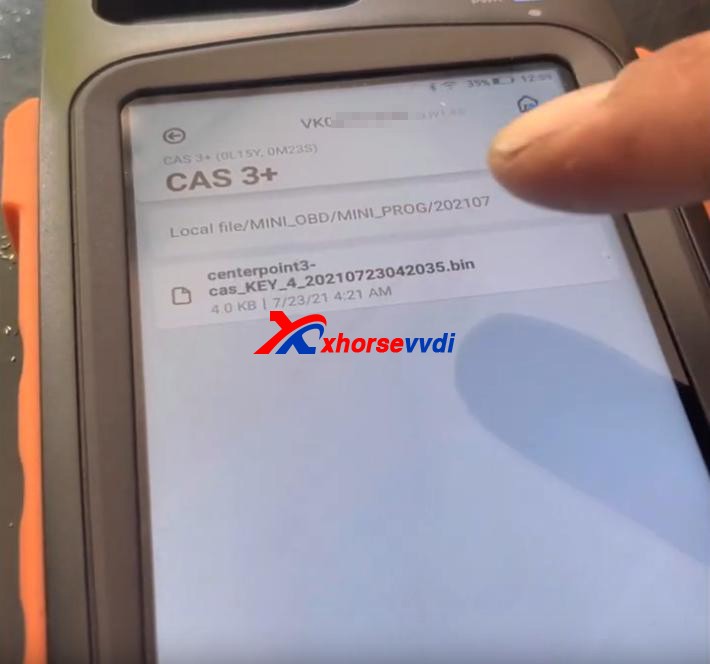
  • DATA1: VVDI2 stepl require data, you can read DATA1 after connect in VVDI-PROG
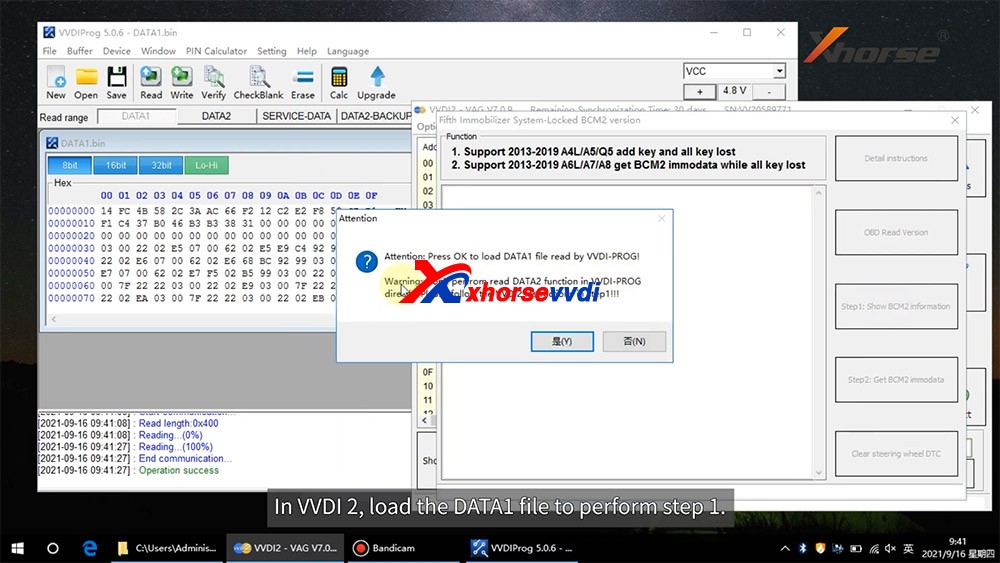
  • DATA2: VVDI2 step2 require data, you can read DATA2 after you get instructions in VVDI2(load DATA1 in stepl)
  • SERVICE-DATA: you can get this data in step2. Write this data to BCM2 activate module
  • DATA2-BACKUP: If read DATA2 failed(cause by power or cable), you can use this function to get DATA2 data

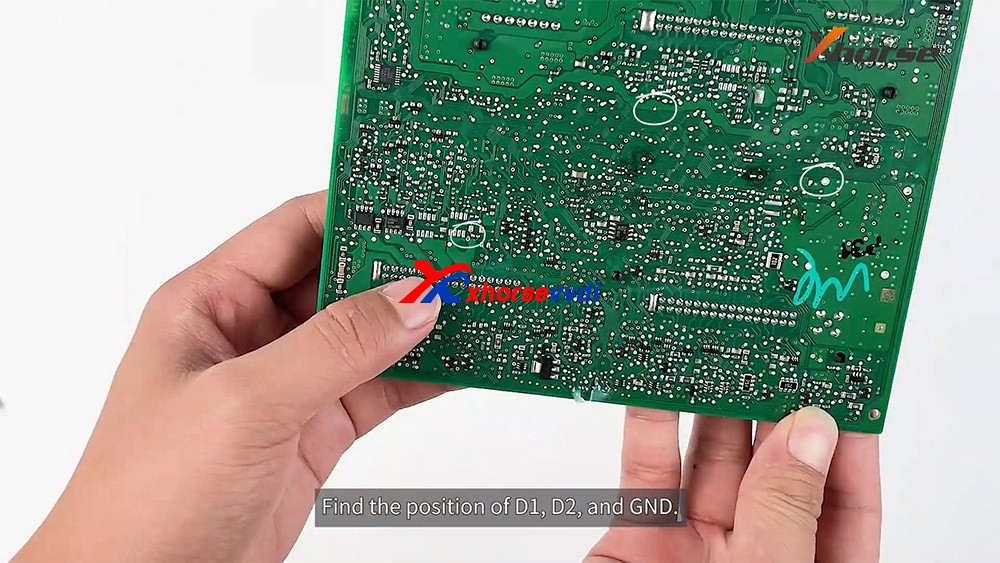
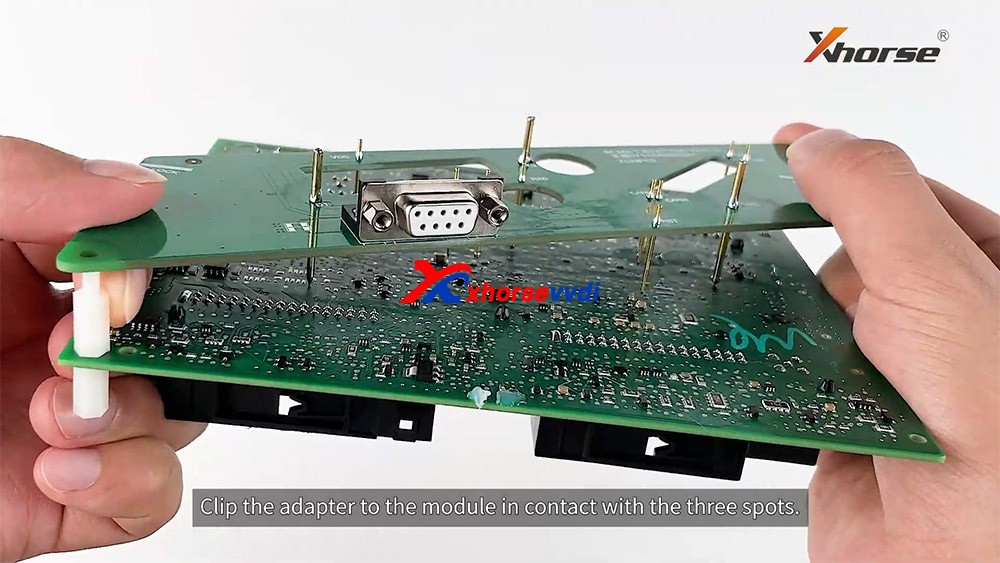
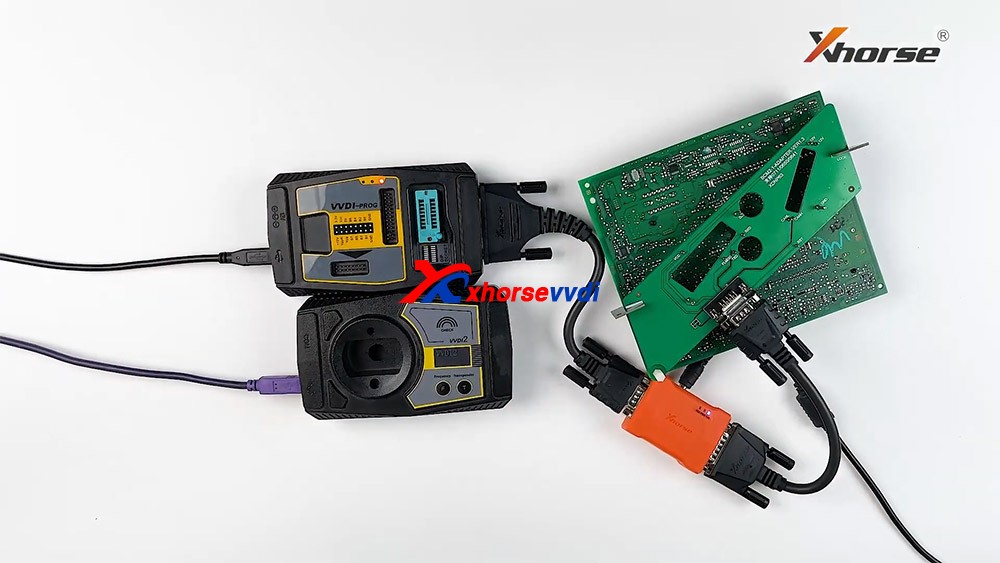
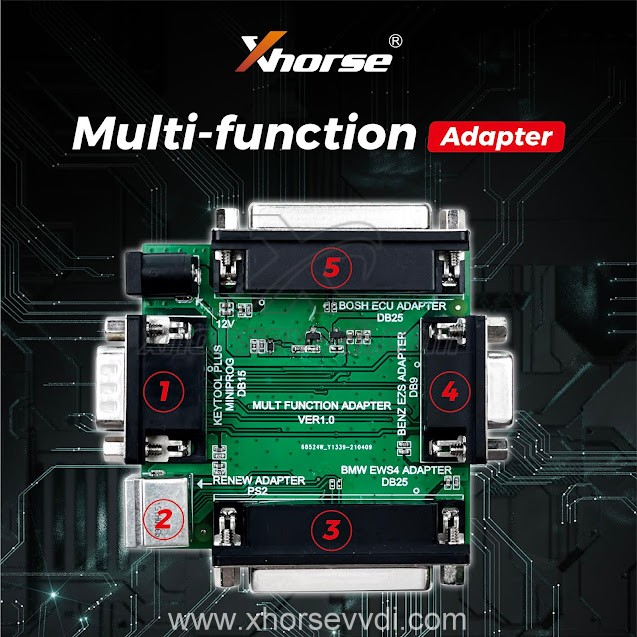
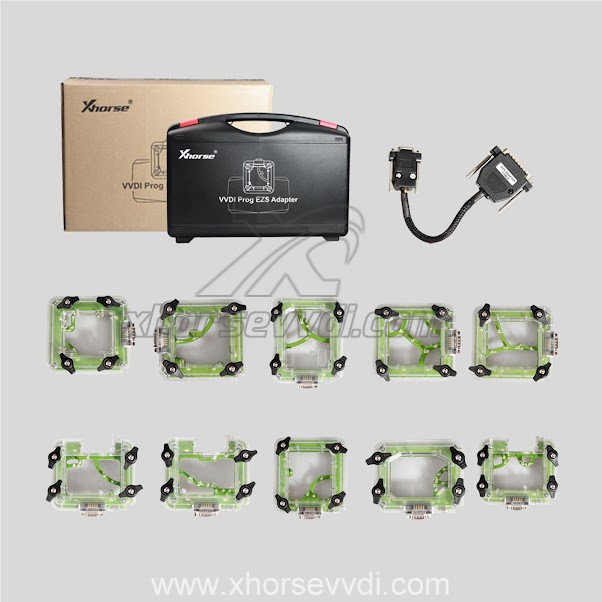
Instructions of using AUDI BCM2 Adapter with VVDI 2 & VVDI PROG:

  • First use OBD Read Version function, OBD read BCM2 version and check support status
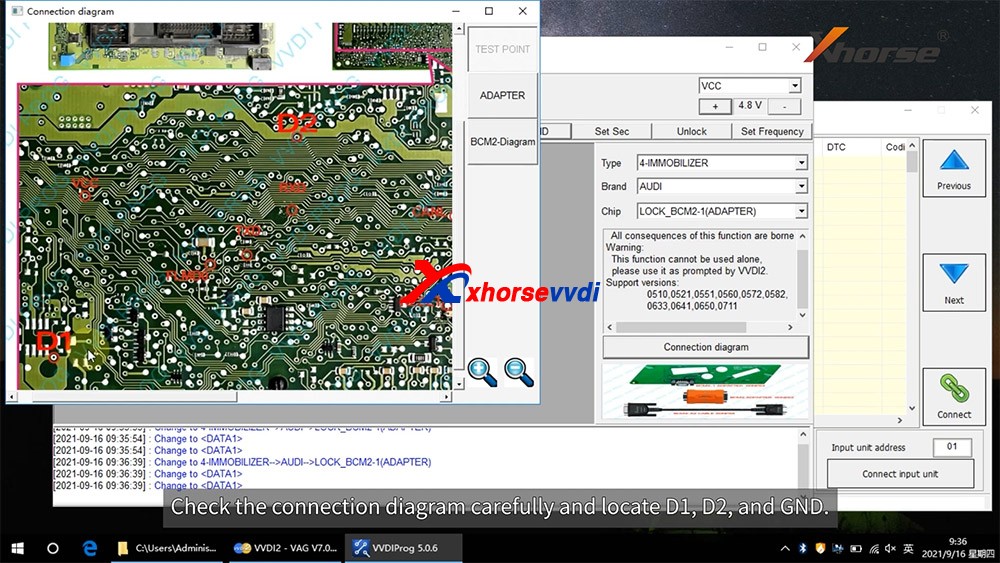
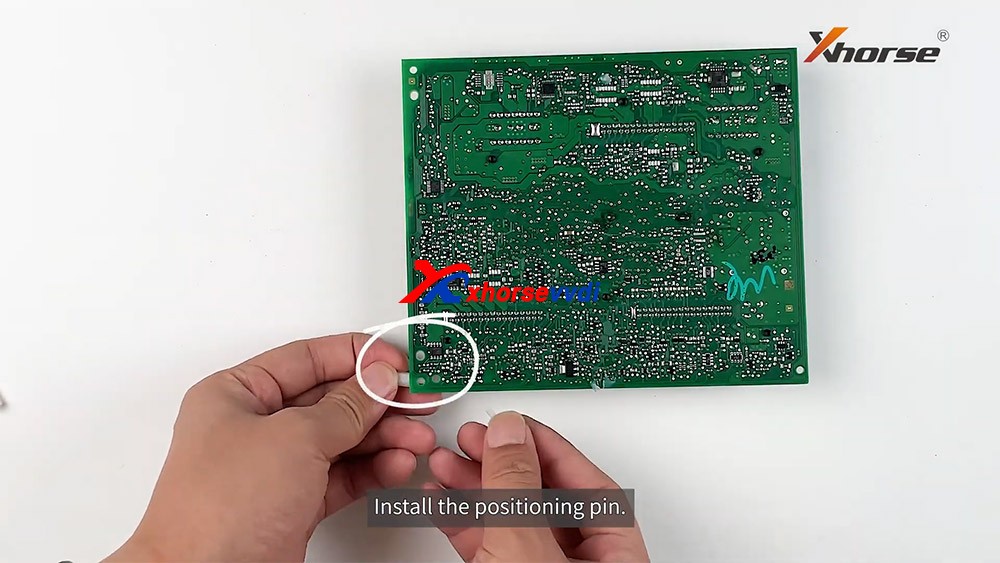
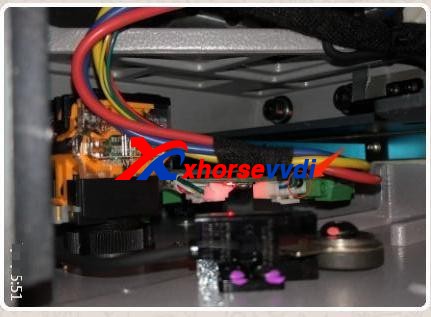
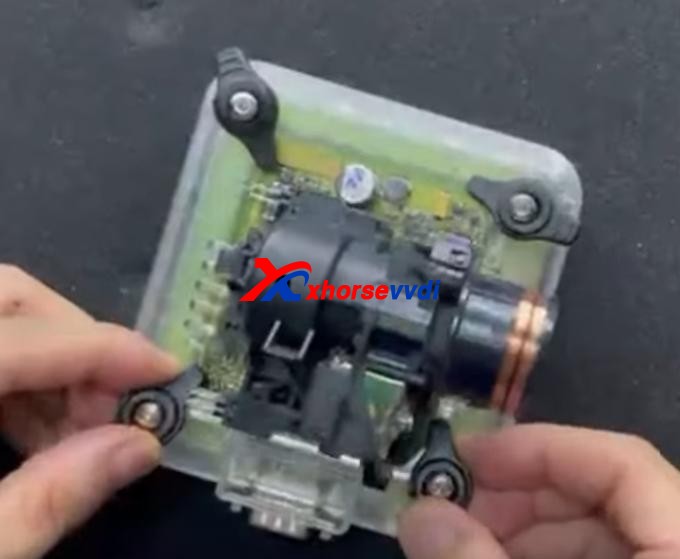
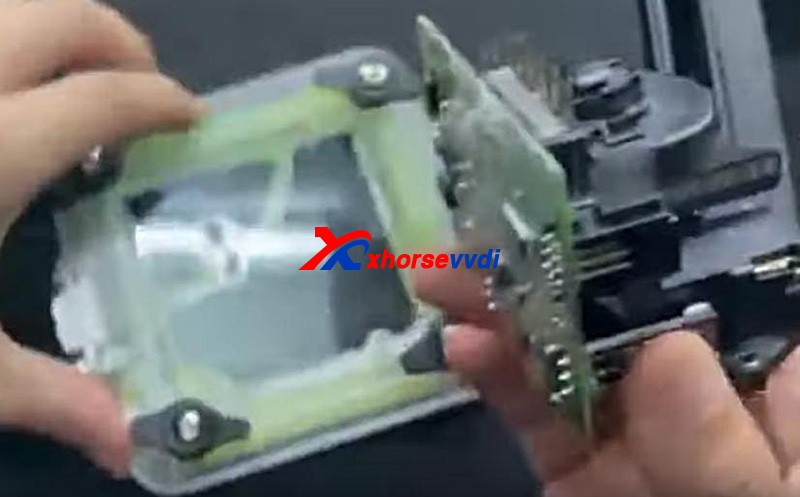
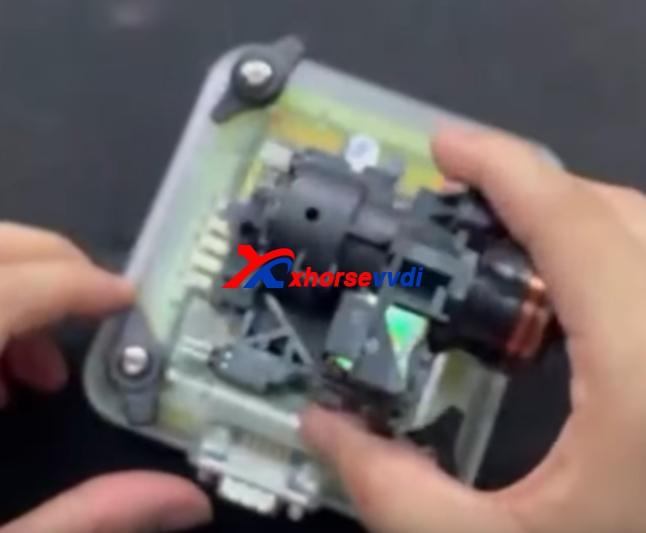
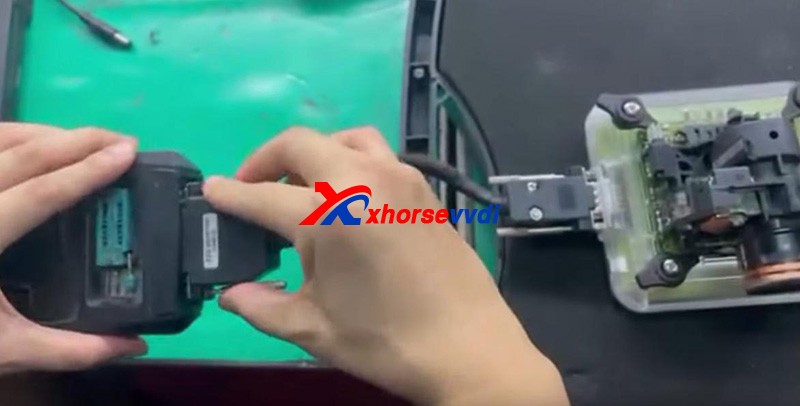
  • Open trunk: Find the BCM2 in right-rear area, remove the two big plug, then small one(DON’T close trunk)
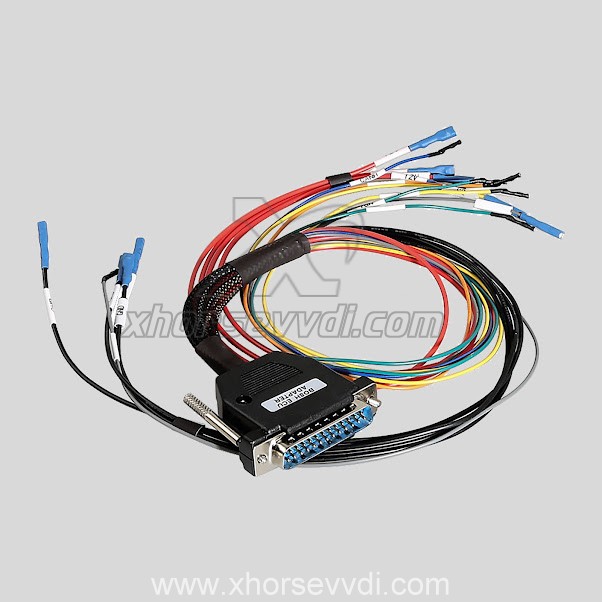
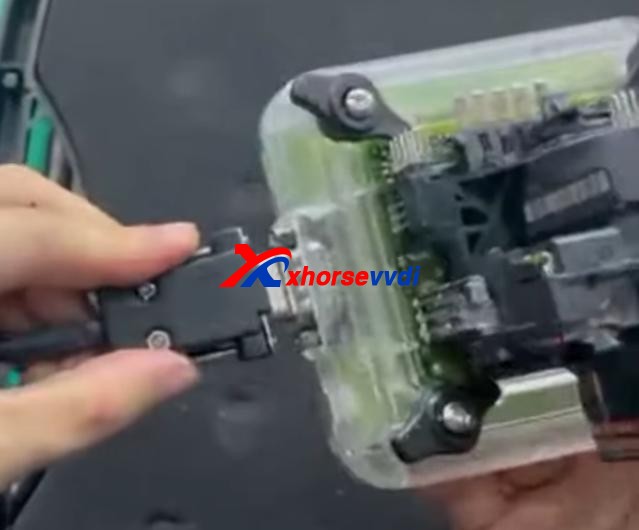
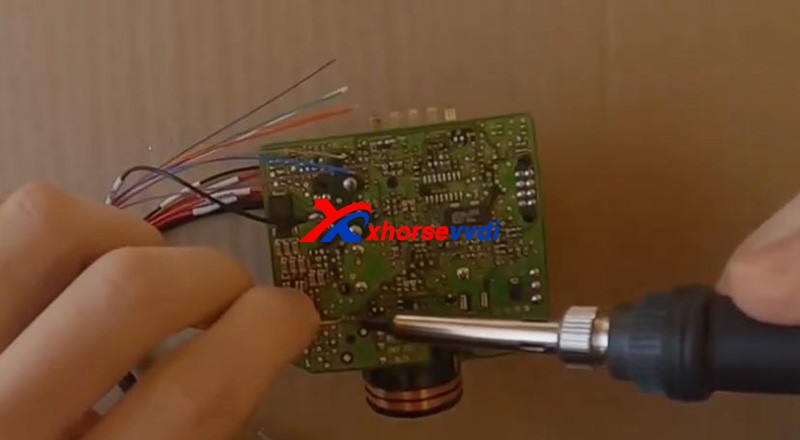
  • Connect VVDI-PROG and BCM2 module, VVDI BCM2 adapter require support +12V
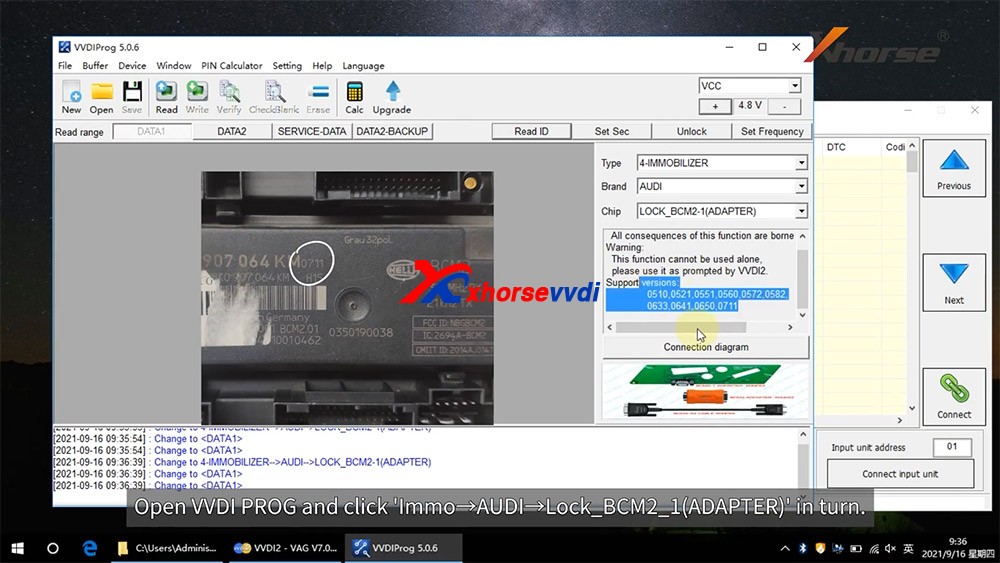
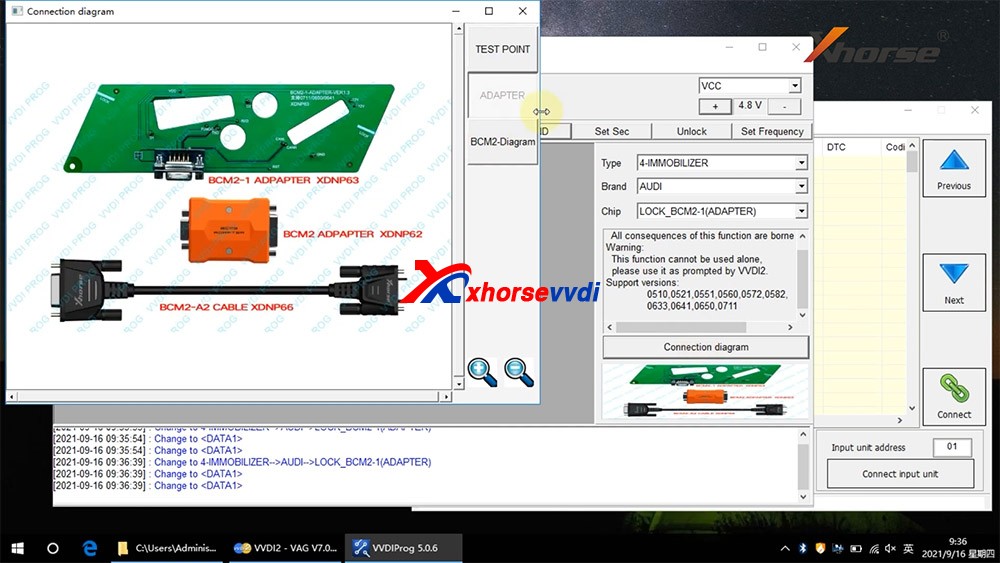
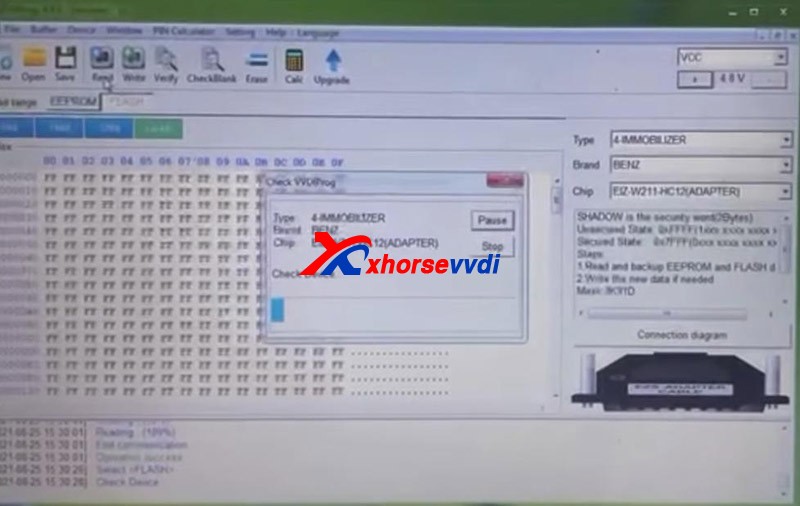
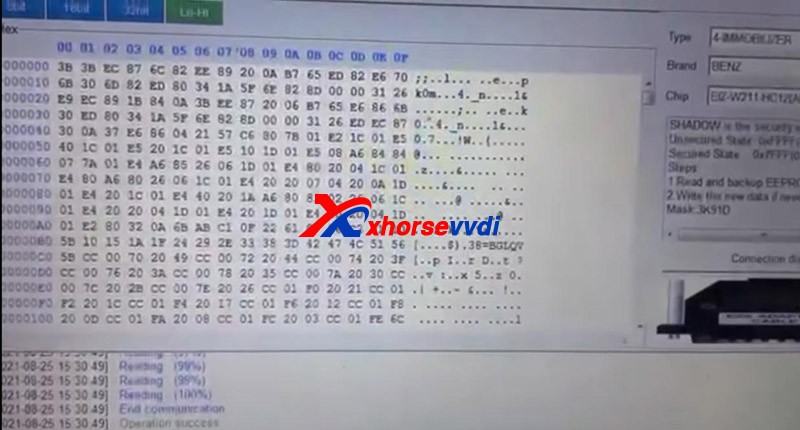
  • Enter VVDI-PROG->immobilizer->Audi->LOCK_BCM2-1 orLOCK_BCM2-2 read DATA1 data and save it(Depends on the SW version)
  • Enter WDI2 stepl, load DATA1 data(require internet), continue with VVDI2 instructions (maybe not need DATA2)
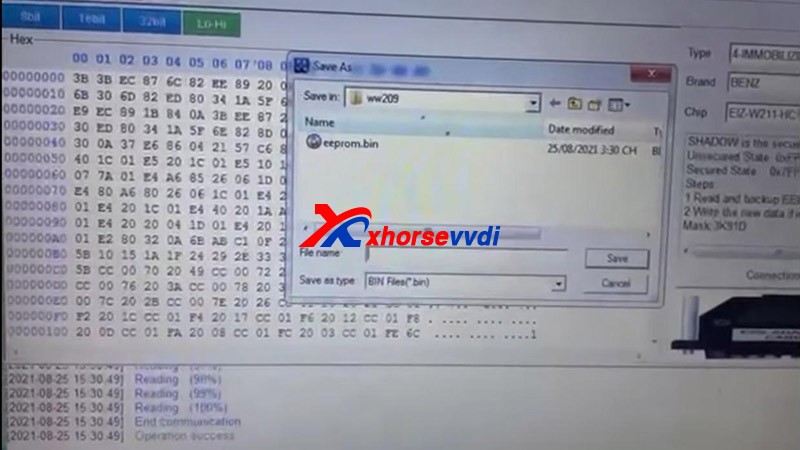
  • If VVDI2 ask you provide DATA2, enter VVDI-PROG read DATA2 and save(After read DATA2, BCM2 will enter service mode)
  • Enter VVDI2 step2, load DATA2 data(require internet), it will save 2 files: BCM2 immodata and BCM2 service data
  • BCM2 immodata can use learn key, BCM2 service data can write to BCM2(make BCM2 work again) with VVDI PRO.
  • After write BCM2 service data, restore BCM2 to car.
  • Enter 5th immobizer system learn key.

How to connect AUDI BCM2 Adapter with VVDI 2 & VVDI PROG 02
How to connect AUDI BCM2 Adapter with VVDI 2 & VVDI PROG 03
How to connect AUDI BCM2 Adapter with VVDI 2 & VVDI PROG 04
How to connect AUDI BCM2 Adapter with VVDI 2 & VVDI PROG 05
How to connect AUDI BCM2 Adapter with VVDI 2 & VVDI PROG 06
How to connect AUDI BCM2 Adapter with VVDI 2 & VVDI PROG 07
How to connect AUDI BCM2 Adapter with VVDI 2 & VVDI PROG 08
How to connect AUDI BCM2 Adapter with VVDI 2 & VVDI PROG 09
How to connect AUDI BCM2 Adapter with VVDI 2 & VVDI PROG 10
How to connect AUDI BCM2 Adapter with VVDI 2 & VVDI PROG 11
How to connect AUDI BCM2 Adapter with VVDI 2 & VVDI PROG 12
How to connect AUDI BCM2 Adapter with VVDI 2 & VVDI PROG 13

Enjoy!

http://blog.xhorsevvdi.com/how-to-use-xhorse-audi-bcm2-adapter-with-vvdi-prog-vvdi2/

Xhorse XDKP30 Multi-function Adapter Connection Guide

Xhorse Multi-function Adapter is developed especially for connecting old adapters such as BOSH ECU adapter, BENZ EZS adapters, etc. to KEY TOOL PLUS and MINI PROG. This is could help avoid purchasing those new accessories coming with KEY TOOL PLUS again and make full use of your old ones.

Xhorse XDKP30 Multi-function Adapter

There’re 5 ports in this adapter in total.

1. Connect to KEY TOOL PLUS and MINI PROG

2. Connect to renew adapters

vvdi renew adapters

3. Connect to BMW EWS4 adapter

BMW EWS4 adapter

4. Connect to BENZ EZS adapter

BENZ EZS adapter

5. Connect to BOSH ECU adapter

BOSH ECU adapter

These adapters all work with different tools from Xhorse, but now together with this Multi-function Adapter, they’re all compatible with KEY TOOL PLUS or MINI PROG. With this adapter, there’s no need to purchase new adapters specially designed for KEY TOOL PLUS or MINI PROG.

Source:http://blog.xhorsevvdi.com/how-to-use-xhorse-xdkp30-multi-function-adapter/

Solved!Xhorse Condor XC-Mini Plus Error “Cut Fail, 38″

Issue:Condor XC-Mini Plus, I can decode a key but cannot cut a key. The cutter will not spin. I get message on screen “Cut Fail, 38 (Error Code=38)”.

Condor Xc Mini Plus Cut Fail 38 (error Code=38) Solution 1

Then he did Stepper motor test and send us results as our technical support required.

Condor Xc Mini Plus Cut Fail 38 (error Code=38) Solution 2
Condor Xc Mini Plus Cut Fail 38 (error Code=38) Solution 3

How to do Stepper motor test?On Homepage, selectSelf Test>>Stepper motor testSelect respectively “X” “Y” “Z” “Main-axis” to test motors.

Condor Xc Mini Plus Cut Fail 38 (error Code=38) Solution 4

Given the result of not-working main-axis motor, the possible reasons could be on firmware or the power board.Here comes the Solution:1)Re-update firmware, make sure firmware gets the latest version.2)Take apart the Condor Mini key cutting machine to test the power board.Note: If you don’t know how to do, do not risk and ask professionals for help.If method 1 doesn’t work, we need to take apart the machine.Unplug&plug all cables on the power board once and watch the indicator change.Feedback: Red light is on solid, not flashing. Find a black wire loose, press it back into plug and machine works.

Condor Xc Mini Plus Cut Fail 38 (error Code=38) Solution 5
Condor Xc Mini Plus Cut Fail 38 (error Code=38) Solution 6

http://blog.xhorsevvdi.com/

How to solve VVDI Max Program XM Smart Key Prox Feature doesn’t Work

Q:

Working on a Toyota Tacoma 2016 smart key board 2110 using VVDI Key Tool Max, Only one option makes the remote work but none has the proximity/smart feature working, Toyota Rav4 2018 the same issue.

Xhorse VVDI Key Tool Max Program XM Smart Key  01
Xhorse VVDI Key Tool Max Program XM Smart Key  02

Here Xhorsevvdi engineers answer:

Sometimes a smart key generated successfully may not fully function the vehicle: remote doesn’t work, doesn’t have smart feature or even one button fails etc., which needs us to modify smart key’s values manually.

Possible reason:

Xhorse XM smart keys are universal keys, not particular for one model like Toyota Tacoma 2016, so we need to customize XM smart key to find correct values for each car.

Solution:

XM smart key customization by VVDI Key Tool Plus or Key Tool Max.

Path: Special Function>>XM smart key customization

Xhorse VVDI Key Tool Max Program XM Smart Key  03

1)Modify Frequency

Sometimes the frequency options given to us is slightly different from that of the smart key to be programmed.

So read out the frequency “A” that your vehicle wants by Xhorse devices, then read original XM smart key frequency “B” and set “B” to “A”.

Xhorse VVDI Key Tool Max Program XM Smart Key  04

2)Modify Baud

Read key’s Baud, increase it by 400, and test if it works perfectly.

If not, add Baud again by 400 until it works well. (The last two numbers may vary automatically, which is normal.)

Xhorse VVDI Key Tool Max Program XM Smart Key  05

Customer feedback:

I had exactly the same problem with a Corolla 2018, and I just made the changes on the ID and frequency as well and everything works…

Thank Tyler and Raphael for sharing!

Hope this could help!

More info, please check

http://blog.xhorsevvdi.com/fixedkey-tool-max-program-xm-smart-key-prox-feature-doesnt-work/

(Solved!)Xhorse VVDI2 Volvo 93С66 pcf7935 key 4 5 6 not available Problem

Problem: Xhorse VVDI2 Volvo V70 1998- with 93С66 and pcf7935. When loading eeprom data, free positions 4, 5 and 6 are not available for writing. How to solve this issue?

VVDI2 Volvo 93С66 pcf7935 key 4 5 6 not available

Xhorse senior engineer replied:

Just generate key from 1,2,or 3 position. No need write back data to immobox if using together with Super Chip XT27A01 XT27A66 Transponder; if using together with the original key, need to write back data to immobox.

http://blog.xhorse.co.uk/how-to-fix-vvdi2-93%d1%8166-pcf7935-key-4-5-6-not-available/

How to use Xhorse Vvdi Prog + Vvdi EZS Adapter to read W211 EIS

Hi there, today Xhorsevvdi is going to show you a simple way to read Benz EIS data. We’ll use Xhorse VVDI Prog and EZS adapter to read Benz W211 EIS. Of course, VVDI Prog is not the only choice, EZS adapter can also work with the VVDI Key tool plus (Xhorse multi-function XDKP30 adapter is needed) or MINI Prog (DB9 cable is needed).


Procedure:

Step 1

First we remove EIS cover.

Then put it in W209/211(HC12) EZS adapter and fasten it.


How to use Xhorse Vvdi Prog + Vvdi EZS Adapter  to read W211 EIS 03

Connect the set to VVDI Prog by the cable supplied.


Supply power to VVDI Prog and connect it to PC.


Step 2

Open up VVDI Prog software.

Select

Type>>“4-IMMOBILLIZER”

Brand>>“BENZ”

Chip>>“EIZ-W211-HC12(ADAPTER)”.

Select “EEPROM” and press “Read” to get EEPROM data.

How to use Xhorse Vvdi Prog + Vvdi EZS Adapter  to read W211 EIS 06
How to use Xhorse Vvdi Prog + Vvdi EZS Adapter  to read W211 EIS 07

Click on “Save” to save EEPROM data.

Select “FLASH” and press “Read” to get FLASH data.


Also click on “Save” to save FLASH data.


Done!

It’s really easy for VVDI PROG to read Benz EIS data with EZS adapters.

Without the adapter, you have to solder cables to EIS circuit board. That would be a tough job.


More things to simplify your job, please check

http://blog.xhorsevvdi.com

How to Check Xhorse Key Tool Plus Mercedes Benz / VW Tokens?

How to view the tokens for Mercedes Benz and VW MQB with Xhorse VVDI Key Tool Plus in step by step.

Part 1. How to View MQB Online Tokens with VVDI Key Tool Plus

Immo programming -> VW -> Get immo data online -> Start programming -> Balance inquiry

How to check MQB Online Tokens with VVDI Key Tool Plus 01
How to check MQB Online Tokens with VVDI Key Tool Plus 02
How to check MQB Online Tokens with VVDI Key Tool Plus 03
How to check MQB Online Tokens with VVDI Key Tool Plus 04
How to check MQB Online Tokens with VVDI Key Tool Plus 05

Part 2. How to View MMercedes Benz Tokens with VVDI Key Tool Plus

Immo programming -> Benz -> Select from system -> Password calculation -> Start programming -> Query the Benz points -> here you will see how many times for free calculation, how many times for paid calculation, how many bonus.

How to check MQB Online Tokens with VVDI Key Tool Plus 06
How to check MQB Online Tokens with VVDI Key Tool Plus 07
How to check MQB Online Tokens with VVDI Key Tool Plus 08
How to check MQB Online Tokens with VVDI Key Tool Plus 09

PS: You can get Key Tool Plus for Mercedes Benz Password Calculation Token at here:
https://www.xhorse.co.uk/wholesale/1-token-for-vvdi-key-tool-plus-password-calculation-for-sn-vk08.html

BMW M3 2011 add key with Xhorse VVDI Mini Prog & Key Tool Max

Xhorsevvdi.com is going to share with you how to use Xhorse Key Tool Max and VVDI Mini Prog & BMW CAS3+ adapter to add a new key for BMW M3 2011 with a CAS3+ module.

Step 1

First remove the CAS3+ module.

Now on bench, clean points on the module.

Remove MINI Prog head.

Then Use XDNP11 BMW CAS3+ adapter to connect VVDI Mini Prog and the circuit board.

BMW M3 2011 add key with Xhorse VVDI Mini Prog & Key Tool Max 01

Step 2

Turn on MINI Prog.

Open up Xhorse app on your phone.

Switch to the MINI Prog page.

Click on “Select” to connect your phone to mini prog.

BMW M3 2011 add key with Xhorse VVDI Mini Prog & Key Tool Max 02

Step 3

Select

  • Immo>>BMW>>BMW>>CAS3+(0L15Y)(ADAPTER)

Check if it’s connected well by diagrams.

Then select

  • Read>>EEPROM>>Start operation

Data reading success and save the file.

BMW M3 2011 add key with Xhorse VVDI Mini Prog & Key Tool Max 03

Step 4

Now back to Key Tool Max page.

Select

  • Special Function(Network connection needed)>>Immo Data Tool>>Europe>>BMW>>CAS3+ (0L15Y, 0M23S)>>CAS3+

Load the file we just saved.

BMW M3 2011 add key with Xhorse VVDI Mini Prog & Key Tool Max 04

Follow the prompt to add a new key.

Done!

That’s the procedure of BMW CAS3+ key programming using VVDI Key Tool Max and Mini Prog with Xhorse BMW solder-free adapter.

http://blog.xhorsevvdi.com/xhorse-vvdi-mini-prog-key-tool-max-add-key-for-bmw-m3/

(Solved) Ford Remote only working inside car after programming by Key Tool Plus?

Customer feedback:

I programmed Ford Edge 2009 key and remote by Xhorse VVDI Key Tool Plus. The program was successful, the key can start the engine and the remote can lock/unlock doors. The remote can work when I was inside and the driver’s door is closed, but the remote will not lock/unlock doors once I step out of the car and close the driver’s door.

In addition, I found my key’s working range is about 5-10m, but I have to remove the cover of the key fob and use the key fob. If I put it back, it still only works inside the car.

Xhorsevvdi engineer believes Key Tool Plus Pad supports Ford Edge 2009 key and remote programming, so the problem may be the key itself.

Here are the Solutions:

1.Replace the key battery

The battery may be dead or of low power, so replace the battery or try another key.

Whichever you choose, you may need to reprogram it using  Key Tool Plus.

There are two options for this model: “Select by model” or “Select by system”.

If functions of model selection fail, go to functions of system selection.

2.Clean the key circuit board

Circuit boards in the key fob is easy to get wet or corroded, although the key quality varies in OEM key and Aftermarket key.

Use a dry, soft brush to clean off oxidized matters gently.

If it’s a surface carbon buildup, try a cleaner like “CO Contact Cleaner”.

3.Re-solder the battery contacts

There may be a “dry” solder joint or a scratch on the battery connector.

Solder wires for “+” and “-” battery contacts.

If you don’t know how to use a soldering iron correctly, don’t do it yourself.

Done! Hope this could help!

http://blog.xhorsevvdi.com/fixed-ford-remote-only-work-in-car-after-add-key-by-vvdi-key-tool-plus/

How to use Xhorse VVDI2 program key on VW Golf 2019 Key?

This tutorial on how to add a spare key to a 2019 Volkswagen Golf with a Johnson Controls instrument cluster, using an Xhorse VVDI2 and VAG Helper. Let’s see what’s going on.Xhorse VVDI2 doesn’t support Johnson controls.Got VVDI2 connected and open up VVDI2 software.Then pressKey Learn>>MQB platform instrument immobilizer>>Instrument with NEC+24C64If we click on “Diag”, it will identify the instrument cluster.After connecting to the device, it will tell us it’s unsupported.

vw-golf-2019-johnson-controls-add-key-by-vvdi2vag-helper-success-1

Get immo dataDisconnect the OBD connector and put in VAG OBD Helper.Open up VAG OBD Helper.Just hit “Read car information”.For a while, it will display things like VIN and tells you the next step.

vw-golf-2019-johnson-controls-add-key-by-vvdi2vag-helper-success-2

Then follow to press “Online calculate immo data”.This process took us around 10 minutes to calculate.Then it will show you data file location, tips and supported devices.

vw-golf-2019-johnson-controls-add-key-by-vvdi2vag-helper-success-3

Go to that path, we could find bin files for like VVDI and Lonsdor.

vw-golf-2019-johnson-controls-add-key-by-vvdi2vag-helper-success-4

We can also look at the detailed log file.As we see, earlier it says “Current car manufacture now stop provide service”, but try again a couple of times it worked fine.

vw-golf-2019-johnson-controls-add-key-by-vvdi2vag-helper-success-5

Prepare dealer keyGo back to VVDI2.Here we go to “Immo data prepare key”.Load the immo data file as the prompt.Then it says “This file is not supported by current module”, and the reason is the selected instrument type.

vw-golf-2019-johnson-controls-add-key-by-vvdi2vag-helper-success-6

So we exit and open up again.What we want to do is wanting it not think we’ve got a Johnson control cluster.Go toKey Learn>>MQB platform instrument immobilizer>>Instrument with NEC35XXWe choose this option because the file is called a 35xx.Then we hit “Immo data prepare key” and load the file.SelectPrepare normal dealer key>>Add key

vw-golf-2019-johnson-controls-add-key-by-vvdi2vag-helper-success-7
vw-golf-2019-johnson-controls-add-key-by-vvdi2vag-helper-success-8

 Insert the original key into Xhorse VVDI2 as the prompt.Save the sync data.Insert the new key into VVDI2 as the prompt.Prepare dealer key success.

vw-golf-2019-johnson-controls-add-key-by-vvdi2vag-helper-success-9

Add keyPressAdd key>>Learn key, login with security code from immo dataLoad the immo data file and input learning key number – 2.

vw-golf-2019-johnson-controls-add-key-by-vvdi2vag-helper-success-10

First turn on the ignition by the original key.Now we can see “ Key mode 1-2” on the cluster.

vw-golf-2019-johnson-controls-add-key-by-vvdi2vag-helper-success-11

Then put in the new key.

vw-golf-2019-johnson-controls-add-key-by-vvdi2vag-helper-success-12

Hit “OK” to finish the learning process.All keys successfully learned.

vw-golf-2019-johnson-controls-add-key-by-vvdi2vag-helper-success-13

 Done!Now we can start the vehicle by the two keys.This is how we add a spare key for VW Golf 2019 with Johnson modules by Xhorse VVDI2 and VAG Helper.https://www.xhorsevvdi.com/service/xhorse-vvdi2-add-key-for-2019-volkswagen-golf.html

Design a site like this with WordPress.com
Get started